Social Icons

A Not So Genetic Inheritance

Wednesday, October 26, 2011

   Our parents impart a number of gifts, and sometimes curses, upon us. My parents certainly gave me their thirst for knowledge, an eternal self driven work ethic and the never ending suspicion that I can do better.

   They also encouraged my cooking, my drawing and my desire to read books cover to cover in a single day. They looked on in amusement when I doubted myself and always ignored my tendency to back out of major decisions at the last second (college, medical school, piano recitals... I infallibly ended up cowering in a corner just before the big moment, asking to be let off the hook, and inevitably grateful that I wasn't).

   My mother instilled perhaps the best gift of all. She insisted I put only the highest quality and tastiest of foods in my mouth.


   When the five of us were little (the whole brood only eight years apart in total) it would have been an incredible weight lifted from her shoulders to reheat microwave dinners or serve fast food picked up on my dad's way home from work. But she never did. My mom always served meals she concocted from scratch- brown rice, whole wheat bread. I remember her insisting whole grain spaghetti was going to be the next big thing a good number of years before celebrities and famous fitness gurus were waxing poetic about its benefits. She made cabbage soups, vegetable purees and stocked the bottom drawer of our fridge (our snack drawer) with fresh fruits and vegetables. One of my favorite pictures is of myself and my two older siblings, all within three years of each other and the oldest barely over the age of seven, enjoying giant, orange carrots from my grandmother's garden.

   My parents gifted myself and my siblings a childhood free of processed foods, high fructose corn syrup and harmful shortcuts to serving a meal. It was a joint effort on their part, but as a grown woman putting meals on a table daily, I now understand the immense effort my mother tirelessly put in. I couldn't be more grateful.


   True to form, she emailed me the following recipe not so long ago. Leafy greens, tasty fish redolent with omega-3's, a simple yet elegant composition- it is flavorful, healthy and indulgent all at the same time. This dish has my mother written all over it.

   Bon appetit.

Stuffed Salmon Fillets 
  • Two 6 ounce salmon fillets
  • 2 handfuls fresh baby spinach
  • 1 handful fresh basil leaves
  • 1 sundried tomato in olive oil
  • Olive oil
  • Salt and pepper
   Preheat the oven to 400 degrees.
   Place the spinach in a bowl and microwave until slightly wilted (around 30 seconds). On a cutting bored slice the basil thinly, then roughly chop the spinach. Mince the sundried tomato. Toss all of these together until incorporated.
   Along the thick side of the fillet, make a deep incision with a sharp knife, making it as wide as you can without cutting through the other side. Stuff each with the filling, dividing it evenly between the fillets. Sprinkle each fillet with olive oil, salt and pepper.
   Bake in a tin foil lined baking pan for 20 minutes or until it has attained your desired crispiness.
   Note: my mother recommends 1 tablespoon chopped pine nuts in the stuffing, but I didn't have any on hand so it was omitted. Still delicious.
   Serves 2.


Dress Me in Brownie Batter

Monday, October 24, 2011

   Halloween is upon us!


   I love this holiday. I think the sentiment of saying goodbye to summer with a raucous, dressed up bash is wonderfully romantic and fitting. Although summer remains closest to my heart of any time of year, Halloween marks the start of the holiday season, an annual wonder that I adore to no end.


   This year I feel especially excited for the holidays to begin. I'm not sure if it's because Steve and I have fully settled into our new home town, or because we plan on having festive nightly fires in our little fireplace, or if it's because I'm working at a job I love with people I adore, but this year feels especially glowing with good will and anticipation. On second thought, I do believe it has to do with all of the above.


   One thing I especially love about the holidays (perhaps this is stating the obvious) is all the cooking and baking involved! Each holiday has its own set of flavors, colors and distinctive ingredients; a melange of happiness and comfort around the table or tree.


   Halloween, of course, demands candy and sweetness. I don't often eat candy by itself, in fact, I very, very rarely do. Halloween heralds the occasional exception, because when it comes down to it, I like my treats home made. When I do partake in candy, however, the good old Reese's Peanut Butter Cup is a favorite.

   Instead of eating them plain, I wanted to dress them up, make them fitting of this holiday, so famous for its costumes and masks.

   I decided to cloak them in brownie. They're adorable. They're delicious. They taste just like Halloween.

Peanut Butter Cup Brownie Bites Recipe
   Adapted from SavorySweetLife.com
  • 3/4 cup butter, melted
  • 3/4 cup white sugar
  • 3/4 cup brown sugar, packed
  • 2 teaspoons vanilla extract
  • 2 eggs
  • 3/4 cup all-purpose flour
  • 1/2 cup unsweetened cocoa powder
  • 1/2 teaspoon salt
  • ~40 mini Reese’s Peanut Butter Cups, unwrapped from the brown paper
  • Mini cupcake papers
DIRECTIONS
  •    Preheat oven to 350 degrees F.  Line your mini cupcake pans with papers.  In a medium bowl, mix melted butter, sugars and vanilla.  Beat in eggs one at a time. Gradually add flour, cocoa, and salt and mix until combined.
  •    Fill each cupcake slot slightly more than halfway but not more than 2/3 full.  Place a peanut butter cup in each slot pressing it down until it is almost level with the batter.  Bake in preheated oven for 15-18 minutes or until done. Remove mini cupcakes from holder and cool to room temperature.
  • Repeat as necessary to use up the batter.
P.S. This recipe is a fabulous excuse to buy two mini cupcake tins. They're beyond cute. You know you want them.

The Mighty Chickpea

Saturday, October 22, 2011

   If someone were to press me to name my favorite legume, I would have a hard time of it. They are all so delicious, how to choose! In fact, I've recently begun making 15 bean soups, mostly because I get so many different kinds of those delightful goodies in each and every bite.
   However, the simple truth is that I have a longstanding loyalty to the humble chickpea.
   Perhaps it's because of the chickpea's versatility, its nutty, earthy flavor, or that it can lend crunch or velvety smoothness depending on how it is cooked. Or, maybe it's just because this is the first legume I ever ate and really enjoyed.
   I sometimes think my mother could only ever reliably get me to eat two things when I was little- butternut squash and chickpeas. Not such terrible addictions to have, but limiting nonetheless. My first memory of chickpeas is my mom letting me mix them into her delicious chicken soup. I insisted we include chickpeas when in her brothy, vegetable laden soup because, obviously, they were chickpeas, they belonged with the chicken soup! It made incredible sense to my four year old mind and my lovely mother tirelessly obliged.
   In most recent years I enjoy my chickpeas in Chana Masala. It has become one of my absolute favorite ol' reliable recipes and Steve and I break it out at least every few weeks. It fills the house with fragrant hints of India and makes for rock star leftovers.
   I made it for the first time early on in our relationship; it's still one of my favorites of our dates. We roasted salty baby potatoes and green beans as sides and enjoyed a crisp bottle of Martin Codax Albarino (if you haven't tried this bottle, I insist you do!). Heaven.


   After moving south I discovered, with much heartbreak, that most grocery stores down here don't sell whole cumin seeds. When I finally found some I was so excited to be able to make my beloved spicy chickpeas I bought three jars! The other key spice is a blend you can find in most well stocked grocery stores called Garam Masala. It has a number of spices mixed in, including, surprisingly, cinnamon. It is an absolute revelation the first time you cook with it.
   I hope you enjoy.

Chana Masala
   Adapted from Molly Wizenberg's "A Homemade Life"
  •   One medium to large onion, coarsely chopped
  • 1/4 cup olive oil
  • 2 cloves garlic, minced
  • 1 1/2 teaspoons whole cumin seeds
  • 2 teaspoons garam masala
  • 1/4 teaspoon ground ginger
  • 1/4 teaspoon cayenne pepper
  • 1 1/2 teaspoons kosher salt
  • 1/2 teaspoon ground corriander
  • 1/4 cup water
  • One 28 ounce can crushed tomatoes
  • two 15 ounce cans chickpeas, drained and rinsed
   In a heavy bottomed pot, such as a dutch oven, heat the olive oil and onion over medium heat. Cook, stirring occasionally, until the onion is very browned, even charred in places. You want them quite caramelized. It will take around ten minutes.
   Add all the spices and the garlic, stir until toasty and fragrant, about 30 seconds. Add 1/4 cup water and stir until evaporated. It will bubble and steam vigorously, so avert your face! Add the tomatoes, stir to incorporate, and allow to gently simmer, covered, for ten minutes. Add the chickpeas and gently simmer, still covered, for another ten minutes.
   We like to serve this with a side of whatever vegetable is in season and wild or brown rice.
   Makes 6 servings.

Dreams of Saffron

Saturday, October 1, 2011

   I remember the first time I heard of saffron. I was in my early teens and reading about the crocus plant, mostly because I had one that appeared to be floundering just a bit. In the midst of my research to find a cure for my pretty flowers, I read about how the prized crocus plant is grown in large fields and their stamens- just two per plant- are painstakingly harvested by hand and sold as the (understandably expensive) spice saffron. This spice is simply beautiful: tangled tendrils of bright yellow-orange threads, appearing light as air, something that belongs in possession of a fairy.


   I never cooked with the spice, partly because of its price and partly because I'd never tasted it before and therefore had little cause to crave it. Then, last week, Steve and I had Mexican night at a good friends house and since they were making amazing sounding toastadas, I wanted to contribute something just as tasty and beautiful. Enter Spanish Rice, stage left.


   It came together surprisingly fast- I collected the ingredients, followed the recipe, and we were all rewarded with a confetti of delicious, beautiful yellow rice. The flavor of saffron is extremely difficult to describe. It is complex, earthy and maybe slightly sweet, but the way it saturates this dish is a delicate and yet commanding complexity.

   Long story short: suck it up and buy yourself a spice jar of this stuff. A little goes a long way, the jar will last a long time, and it's just plain worth it.


   As a bonus, I celebrate my continued love affair with cabbage by sharing my new favorite recipe starring that handsome ball of greenery- smoky coleslaw. I invite you to eat it straight from the bowl, a bright and fresh dish that stands as a main course all its own, as long as you love the cabbage as much as it deserves. I sure did.


Yellow Rice
   Adapted from Mark Bittman's How to Cook Everything

3 cups chicken stock
Large pinch saffron
2 tablespoons butter
2 tablespoons olive oil
1 cup chopped onion
1 red bell pepper, cored, seeded and chopped
1 tablespoon minced garlic
1/2 cups long or medium grain white rice
Salt, to taste
1 tomato, cored, seeded and chopped
1 dried bay leaf
1 1/2 cups frozen peas
Chopped fresh parsley, to finish

   Place the saffron and stock in a small pot and bring to a simmer. While that comes to a simmer, put the butter and oil in a medium sized heavy bottomed pot or dutch oven and heat over medium heat. When butter has melted, add onion and red pepper and cook, stirring occasionally for about 5 minutes or until the onion is translucent.
   Stir in garlic and rice and cook until rice is just beginning to brown slightly and is toasty fragrant, about 5 minutes. Add tomato, bay leaf, peas and stock with saffron. Stir in 1 teaspoon salt and bring to a simmer. Cover and cook, stirring once in a while, for about 15 minutes.
   Once most of the liquid has absorbed, turn the heat off and allow to sit another ten minutes. Remove bay leaf, and taste some rice. If they are still slightly crunchy in the middle, add another 1/2 cup of stock and allow to rest another ten minutes. Do this until the rice is perfectly tender, and adjust the salt along the way.
   Garnish with chopped parsley and serve to your eager and soon to be quite pleased quests!

Smoky Coleslaw

1 clove garlic, minced
1 tablespoon adobo sauce (from a can of chipotle peppers in adobo sauce- place the remaining peppers and sauce in an airtight container and it will keep for a month in the fridge)
1/4 cup freshly squeezed lime juice
2 teaspoons brown sugar
1 teaspoon salt
1/4 cup olive oil
2 cups finely sliced green or read cabbage
1 bunch radishes, julienned
1/2 bunch chopped cilantro

   In a medium sized bowl, whisk together the garlic, adobo sauce, lime juice, sugar and salt. Slowly whisk in the olive oil. Add the cabbage, radishes and cilantro and toss thoroughly to coat evenly. You can eat this right away or allow it to sit for a half hour or so to tenderize. Either way, it's delicious!

Cinnamon Bun Sunday

Sunday, September 11, 2011

   I can't help myself- I have another baked good for you!

   It is Sunday after all, and Sunday demands leisurely brunches and tall, thin glasses of mimosa. Or, at the very least, home made cinnamon buns. This is the same recipe I used to make the sticky buns I mentioned several posts ago, but I left out the sticky and added a delicious white frosting. If I do say so myself, this bun is perfection.


   All you really need as a well made hunk of brioche dough, and I'm here to show you how. Brioche is my favorite of all home made breads. It was my quest to perfect this golden hunk of doughy goodness that prompted me to covet those big beautiful stand mixers (just try making this dough properly by hand or with a hand held mixer... not fun!). Years later, Steve surprised me on my birthday with one of those gorgeous, silver monsters and the first thing I made was brioche. Heaven.

   It can be tricky getting this dough to turn out quite right, which is why I've taken pictures of the stages it goes through. This dough really transforms as you work with it, as long as you have faith.


   You can shape brioche into loaves and serve thick, buttered slices of it along side dinner, or as french toast. They make incredibly cute, baby brioche molds that make individual sized dinner portions. Or, you can roll it out and make tender, buttery, deliciously golden cinnamon buns! You're really only limited by your imagination with this dough.

   You only need half the recipe for the buns so you can use the rest for dinner rolls or whatever you desire. Or, of course, you could just make twice as many cinnamon buns. Never a bad idea.

   As a preemptive warning, this recipe calls for a lot of butter...


   But just take a deep breath and do it. It's so worth it.

Brioche Cinnamon Buns
The dough is from Joanne Chang's Flour Cookbook

For the Dough:
2 1/4 cups (315 grams) unbleached, all purpose flour
2 1/4 cups (340 grams) bread flour
1 1/2 packages (3 1/4 teaspoons) active dry yeast
1/3 cup plus 1 tablespoon (82 grams) sugar
1 tablespoon kosher salt
1/2 cup (120 grams) cold water
5 eggs
1 cup plus 6 tablespoons (2 3/4 sticks, 310 grams) highest quality unsalted butter at room temperature

For the Filling:
6 tablespoons unsalted butter, melted
3/4 cup raisins
1/4 cup granulated sugar
1/4 cup firmly packed brown sugar
2 teaspoons cinnamon

For the Frosting:
4 ounces cream cheese, at room temperature
2 1/2 cups confectioner's sugar
1/3 to 1/2 cup milk
1/2 teaspoon vanilla extract

To make the dough:
   The night before you would like to eat your cinnamon buns, fit your mixer with the dough hook. To the mixer bowl, add the flours, the sugar, yeast, salt, water and eggs. Beat on low speed until combined, then mix another 3 to 4 minutes. It will be quite stiff and look like this:


   Now, still on low speed, add the butter, 3 tablespoons at a time, allowing each addition to be completely incorporated before adding the next. Do this until all the butter is incorporated. It will look shaggy and scary at this point, like this:


   But keep going! Scrape down the side of the bowl and beat on low for 10 minutes. Then, increase the speed to medium and leave alone to mix for another full 15 minutes. Now, turn the speed up to medium high and mix for another 1 to 2 minutes until it pulls all together and looks absolutely shiny and gorgeous, like this:


   Place the dough in a bowl, use plastic wrap to cover, pressing it down onto the surface of the dough, and place in the fridge for 6 hours or up to overnight.

   Remove the dough from the fridge, cut the dough in half. Wrap one half in plastic wrap and freeze for up to one week or refrigerate for up to one day and use for something else. With the remaining half, use your rolling pin on a lightly floured surface to roll the dough to 1/4 inch thickness and a rectangle about 12 X 16 inches. Using the melted butter, brush the entire dough surface to coat in butter. Mix the sugars and cinnamon and sprinkle this over the entire dough surface. Sprinkle with the raisins. Start at a longer edge, roll the dough up tightly, like a jelly roll. Cut at 2 inch intervals into disks to make a total of eight buns.

   Coat a 9 X 13 inch baking dish in butter. Arrange the buns in the pan, cover, and place in the fridge over night. Te next morning, remove form the fridge and allow to rise at room temperature 1 1/2 to 2 hours, or until the dough is slightly puffed. Preheat your oven to 350 degrees and bake for 30 to 35 minutes or until golden brown.

   Remove form the oven and allow to cool. As they cool, make the frosting.

   In your mixer fitted with the whisk, beat the cream cheese, confectioners sugar, 1/3 cup milk and the vanilla extract until very smooth. If not the desire frosting consistency, add a little more milk.

   Frost the buns generously and serve very warm.

   Makes 8 buns.

And Then I Baked

Monday, September 5, 2011

   Baking is is the ultimate salve for the soul. I bake to relax, to energize, sometimes to mend aches and worries, and sometimes for plain old comfort.


   This past weekend I had one of my dearest friends visit me and it was an absolute blast. We ate amazing food, talked and caught up, ate more amazing food, and shopped to our hearts content! It felt good to have some girly time and I miss her immensely already.


   Last night, after dropping her off at the airport, I soothed my post visit blues by baking a loaf of yeast risen corn bread for Steve and I to dip in our turkey chili. I've been a long time lover of corn bread, especially hot out of the oven and thickly slathered with butter, but this recipe takes the world of corn bread to a whole other solar system. Rather than using quick bread leaveners like baking soda or powder, this is a traditional yeast bread. The kneading lends it a chewy complexity that corn bread usually lacks and the slow, yeast driven rise gives it that bready complexity that I love so.


   Even though today is Labor Day proper of this holiday weekend, I woke up feeling sad that the weekend was coming to a close, that my friend's visit was over, and work would rumble back to life tomorrow. I get this end of the weekend blues sometimes, a feeling that reminds me of how I felt Christmas night as a child- deliciously tired and happy but somehow hollowed by the thought of the much awaited event being over. So I baked some more.

   This time, peanut butter called my name. These cookies are slightly adapted from the Baked cookbook- a bakery I have the great fortune to frequent whenever I chose thanks to my new locale! They are simply redolent with peanut butter- enough to satisfy those of us who already are devoted to this creamy spread, and convert the doubtful that this is one of the word's all time best ingredients.


   Since starting my new job, I always have a good time once the weeks gets going. I hope the same is true for you, but should you need a small end of holiday pick me up, these recipes should do just the trick!

Honey Corn Bread

1 (1/4 ounce) packet active dry yeast, or 2 teaspoons
1 1/2 cups warm water
1/3 cup honey
3 tablespoons softened unsalted butter, plus additional for brushing
1 teaspoon coarse kosher salt
1 cup yellow cornmeal
2 1/2 - 2 3/4 cups all purpose flour

Honey Butter

1 stick softened salted butter
1/2 cup honey

   In the bowl of your stand mixer, or a medium sized mixing bowl if you don't have a stand mixer, add the warm water. Sprinkle the yeast over the top and allow to bloom, about 5 minutes. Add the butter, cornmeal, flour and salt. Mix with the dough hook or knead by hand for 8-10 minutes until you have a smooth, slightly tacky dough. You may need to add a little additional flour to achieve this texture.
   Coat a mixing bowl in butter. Place the dough in the bowl, turning to coat the surface in butter. Cover and allow to rise at room temperature for 1 1/2 hours. During this time it will double and maybe triple in size depending on the warmth of your kitchen.
   Preheat your oven to 375 degrees. Coat a 9 X 5 inch loaf pan in melted butter. Shape the dough into a rectangular loaf and place in the pan. Allow to rise, loosely covered in plastic wrap, for 30 minutes. Brush the surface in melted butter and bake for 40 minutes (it will be golden brown and sound hollow when tapped at this point).
   Meanwhile, make the honey butter. Use a wire whisk to whisk the honey into the soft butter until very smooth. Refrigerate until ready to serve the bread.
   Remove from the oven, and use your oven mitts to remove it from the loaf pan. Cool 10 to 15 minutes before serving sliced with the honey butter.
   Makes one 9 X 5 inch loaf.

Chewy Peanut Butter Cookies
Adapted from Baked: New Frontiers in Baking

1/2 cup all purpose flour 1 tablespoon baking soda
1/2 teaspoon salt
5 3/4 cups rolled oats (not the quick cooking kind)
1 1/2 sticks cold unsalted butter, cut into cubes
1 1/2 cups firmly packed brown sugar
1 1/2 cups granulated sugar
5 large eggs
1 tablespoon light corn syrup
1/2 teaspoon vanilla extract
2 cups creamy peanut butter
2 cups M&Ms

   In a medium sized bowl, mix together the flour, baking soda, salt and oats. Set aside. In a large bowl or your stand mixer, beat the butter till creamy. Scrape down the bowl, add the sugars and beat until combined. Add the eggs, one at a time, combining after each addition. Scrape down the bowl and mix in the corn syrup and vanilla extract. Mix in the peanut butter.
   Add the oat mixture in three additions, beating until just incorporated after each addition. Use a rubber spatula to fold in the M&Ms.
   Cover in plastic wrap and refrigerate for 2 hours.
   Preheat the oven to 375 degrees. Using a small ice cream scoop with release mechanism or two spoons, portion out rounded 2 tablespoon sized balls of dough, spaced two inches apart on the sheet. Bake for 12 minutes. Remove from cookie sheet and cool completely. Repeat with remaining dough.
   Makes 4 dozen.

Feelin' Crabby

Monday, August 29, 2011

   When I was applying for residency I had to take into consideration where in the country I wanted to live. It was my chance to make the big move and I knew I was tired of the bitter cold northeast. Somehow, I felt that my calling must lie in the ethereal south. Southern living has always had a strangely compelling aura about it for me. I've read lots of books over the years set in the south (The Prince of Tides being perhaps one of the most memorable); they all transported me to a place where I imagined balmy nights, loud crickets and other mysterious insects singing resoundingly in the dark. I pictured towering old elms with tendrils of Spanish moss tickling the air beneath their boughs.
   My new home hasn't disappointed me. Night time down here is probably my favorite, which surprised me since sunny days at the beach were part of what drew me here. I love the oddly bright light the night sky takes on here, the stars causing leaves to sparkle and flowers, bright during the day, to take on a strange darkness that still manages to be colorful. The crickets and other bugs I can't even begin to imagine put on such a cacophony of noise it's like being surrounded by an orchestral celebration. I love it.
   But it still was hard to leave the place I called home as a child. During the time I spent interviewing for residency positions, considering new towns and places and people, one of my favorite memories is when my dad braved ice slicked roads to drive me to Virginia for my last interview of the season.
   We arrived when it was already dark, the town seeming rather shuttered and asleep, although it was only just past the dinner hour. Because it was dark I had no concept of what lay around us; my poor geographic sense further handicapped by the tunnel vision night creates.


   We ate at the hotel restaurant, enjoying tall, chilly glasses of beer and thick steaks. My favorite part of the meal, however, was the appetizer- a dip composed of crab and other delicious, creamy things. Unctuous and yet still all about the crab, spread thick on chewy bread, it was comforting and complex at once. Even though I was in a strange state in a strange town with no way of really getting my bearings, I felt happy and relaxed, reassured that no matter where my life takes me I can always sit down for good food and conversation with my dad.
   This recipe is for him, my (too small) thank you for always watching my back, even when my antics are taking me further from home.

Crabby Creamy Dip
  • 1 tablespoon olive oil
  • 1 cup onion, minced
  • 1/2 teaspoon coarse kosher salt
  • 12 ounces lump crab meat, fresh or canned (i use canned)
  • 4 ounces cream cheese, at room temperature
  • 1/4 cup mayonnaise
  • 1/2 teaspoon worcestershire sauce
  • 1 tablespoon freshly squeezed lemon juice
  • 3/4 cup plus 2 tablespoons grated parmesan cheese
  • 1/8 to 1/4 teaspoon cayenne pepper, depending on your preferred spice level
  • 1/4 teaspoon freshly ground black pepper
   Preheat your oven to 400 degrees. Have at ready a shallow baking dish, approximately 8 inches in diameter and 1 inch deep.
   Heat the olive oil in a heavy bottomed skillet over medium heat. Add the onion and sautee until tender, 5-7 minutes. Add the crab meat (allow their juice to cling, they need to have moisture with them and not be completely drained). Reserve crab meat liquid. Stir in lemon juice, worcestershire sauce, cream cheese, mayonnaise, 3/4 cup parmesan cheese and spices until creamy and fully incorporated. If needed, add a little of the reserved liquid to make the dip the consistency cake batter might be.
   Pour into the baking dish, sprinkle the top with remaining 2 tablespoons parmesan cheese and bake at 400 degrees for 15-20 minutes or until bubbly and slightly browned at the top.
   Serve over slices of baguette (my favorite!), pita triangles or crackers.

An Ode to Carnivores

Saturday, August 27, 2011

   Hurricane Irene has officially passed us by. The pine trees lost a lot of cones and our lawn was well watered, but that was the extent of her mighty threat. In fact, as I write, the sun is shining through my window, making me and my orchids quite happy indeed.


   We really were incredibly lucky the storm turned out to be so mild for us. I have everyone north of us in my thoughts, I hope they all are as lucky as we were and make it through Irene's path safely.
   On a food note, I've lately been reflecting on my status as a meat eater. I would wager that most people either grew up with a family member who has tippled in the world of vegetarianism or they have tried it themselves. I'm a member of the former- my mother, for a brief time after my little sister was born, tried vegetarianism. I remember a lot of beans and brown rice and my dad making big pots of his famous hamburg and beans to satisfy his inner carnivore. I'm not sure if it didn't last because it was too much stress to make vegetarian meals that wold please all of us or if she just missed chicken and hamburgers, but in short order we were back to our roast chicken dinners and spaghetti with meat sauce.
   I have no doubt that a complete and nutritious diet can be constructed from entirely vegetarian or vegan dishes. There are so many other delicious foods to enjoy and include in our diets that there generally are two to three days a week that I don't eat meat at all, and in a given day it is part of only one meal. I've always eaten this way and it was a happy coincidence as I got older and started reading about 'eating vegetarian' a day or two out of the week to reduce my carbon footprint. My tastebuds have naturally been doing that for me for years!
   After my many ruminations I've come down to this: meat has a bad rap, for no real good reason. It's our own lazy western faults that meat has turned into the nasty, atherosclerosis causing mystery food it now is. Rather than allow our cows and pigs to roam free, eating grass and roots and whatever else they dig up to their little hearts content, we constrain them to teeny pens, overcrowded and forced to eat corn meal and other unidentifiable and industrialized grains.
   Well, guess what, folks, animals who have been abused with growth hormones, antibiotics and highly refined grains get the last laugh. All those things we poison their bodies with end up in us and all our many cells when we eat them.
   I consider myself infinitely fortunate to have grown up on a farm. One of my earliest memories is of my dad and some of his buddies showing my older brother how to butcher the chickens we had raised. Those chickens were lean and happy buggers, having been raised in huge coops with lots of grass and sun. I was too young to help at that point, but I sure as heck enjoyed the chicken soup my mom made that night.
   A lot of people I discuss this issue with dismiss the idea of eating only organic, grass fed meat as snobbish and far too expensive. Take it from someone who has eaten this way for years, many of them as a college or medical student on a seriously restricted budget: when you dedicate a handful of meals per week to quality, properly raised meat, it won't break the bank and you will reap all the tasty, healthful benefits. And I would say that having the courage to know about and have a say in what goes into your body isn't snobbish, it's just plain common sense.
   Having meat only when it counts means some of your meals do end up being entirely vegetarian. Clean meat and lots of vegetables doesn't just protect your heart and endocrine system, it will broaden your cooking horizons, tantalize your tastebuds and challenge your creativity.


   I've decided to celebrate my status as an omnivore by giving you this recipe for lasagna which is near and dear to my heart- it's full of tomatoes, mushrooms, pasta and, yes, grass fed beef! I love this recipe because the leftovers taste even better than when its fresh from the oven, and I can often stretch them to provide a good three days of lunches for me and Steve. 
   
 Meaty Lasagna
  • 1 1/2 pounds organic, grass fed ground beef
  • 1 medium onion, halved and sliced thin
  • 3 tablespoons olive oil, divided
  • 1 1/2 teaspoons coarse kosher salt, divided
  • 1/2 teaspoon ground black pepper
  • 1-2 pinches red chili pepper flakes
  • 8 ounces baby bella mushrooms, sliced thin
  • 1 1/2 jars marinara sauce or favorite pasta sauce
  • 9 lasagna sheets
  • 1 pound ricotta cheese
  • 12 ounces small curd cottage cheese
  • 1 cup ground parmesan cheese, divided
  • 6 ounces shredded mozzarella cheese
  • 2 eggs
   Preheat your oven to 350 degrees.
   Bring a large pot of salted water to a boil. Add the noodles and 1 tablespoon of the olive oil (this will prevent them from sticking to each other once you've drained them). Cook until the noodles are pliable but not completely cooked, they will finish cooking in the oven- this takes about 8 minutes. Drain completely and set aside until you are ready to assemble the lasagna.
   Meanwhile, sautee the onion, 2 tablespoons oil and 1/2 teaspoon salt in the olive oil until quite soft and starting to brown- about 5-10 minutes. Add the meat, remaining salt, ground pepper and pepper flakes and cook until meat is browned and cooked through. Drain off any excess oil and add the mushrooms, cook until mushrooms are soft. Add the tomato sauce and bring to a simmer while you prepare the cheese mixture.
   In a medium mixing bowl, mix together 3/4 cup parmesan cheese, the ricotta, cottage and motzerella cheeses with the eggs until completely blended.
   In a 9 X 13 inch baking dish, spread a cup of your meat sauce on the bottom. Layer three atop this. Spread about a 1/3 inch layer of cheese mixture evenly atop each noodle. Ladle enough sauce atop the cheese layer to cover. Repeat this process twice more until you've used all the noodles, ending with a layer of sauce. You may have some sauce and/or cheese mixture left over. Sprinkle the remaining parmesan cheese over the top.
   Bake, covered in tin foil, for 30 minutes. Remove foil and bake and additional 15 minutes. Remove from the oven and cool for a full  30 minutes (this is when the noodle absorb and those delicious juices, allowing the layers to stay together when you serve it).
   Enjoy!
   Makes 9-12 servings.

In the Raw

Friday, August 26, 2011


   One fateful day several years ago, a good friend of mine decided to eat a whole clove of raw garlic. It wasn't even a silly juvenile dare- he thought he was being a good little health nut!
   You really can't read anything about garlic without being inundated with its virtuous nutritive qualities. There are quite a few sources that insist garlic in its raw state is even more powerful and better for you than its cooked counterpart.
   Well, that harmless clove turned into a spicy, noxious chemical bomb in my poor friend's mouth and I distinctly remember thinking raw garlic would never be welcome on my palate.
   Fast forward several years when I tasted the best green bean I've ever had. Cool, crunchy, acidic and complex with a spicy bite, it was heaven. I was quite surprised to learn that the recipe called for a significant quantity of finely chopped raw garlic.


   I don't know where he picked the formula up, but this dish was first prepared for my family by my brother in law. Since then I've modified it slightly (different vinegar, more mustard) but the spirit of this spicy bean remains the same. It's all taste and crunch, all reward and flavor for very little effort.
   This can be served as a side or a simple mid afternoon snack- you could even gild the lily and sip on a crisp glass of chilled white wine. I ask only that you promise me to try eating them with your hands. For some reason, I can't bring myself to take my fork to these babies. They simply demand to be plucked from the plate with your fingers and finished off with some proper lip smacking finger licking. I think the best kinds of dishes are flavorful, complex, fun and interactive- all things these beans embody.


   On a side note, Steve and I have accidentally made this weekend an all out Carb Bonanza (can you say tuna casserole, lasagna and pizza?) and a big batch of these green beauties are going to be our nutritional saving grace!

 Garlicky Green Beans
  • 1 pound green beans, stalk end trimmed
  • Coarse kosher salt
  • 4 medium sized cloves of garlic, finely minced
  • 3 tablespoons coarse dijon mustard (the one with all the little seeds)
  • 1 1/2 tablespoons apple cider vinegar
   Bring a medium sized pot of salted water to boil. Have an ice bath prepared. Once the water is boiling, add your beans all at once. After 2-3 minutes they should be bright green- drain and immediately submerge them in the ice water. Drain again and place in a medium mixing bowl. In a cup or small bowl, mix the garlic, vinegar, mustard and 1/2 teaspoon salt together. Drizzle all of this over your beans and toss to coat.
   Enjoy!
   Serves 2-4 depending on how hungry you are.

Papa Eclair

Wednesday, August 24, 2011

   Inclement weather aside, I have been keeping busy the last few weeks- visiting family, working, planning for next year when I officially start my new residency... that last one tuckers me out just thinking about it! I'm looking forward to a (hopefully) quiet weekend.


   But it isn't working on my application or studying for work that is most important- most important is all the fantastic recipe testing that I've managed to squeeze in! There have been Spicy Black Bean Burritos, Coffee Rubbed Pork Tenderloin, Gougeres, Creamy Corn with Swiss Chard and Kale (a keeper- I need to recreate this, write down the proportions and share with all of you), The Infamous Turkey Chili, Chocolate Chip Cookies and- my favorite- Boston Cream Pie.


   Now, I don't remember when my love of Boston Cream Pie began, where I was when I first tasted it or who baked and served that first fateful slice. I do, however, know what I thought of the first time I tasted it: eclairs. Eclairs and all things Pate a Choux, hold a special place in my heart, and a slice of properly made Boston Cream Pie is like an eclair on steroids. All soft, sweet cake, creamy delicious pastry cream and a tantalizing ribbon of mysterious, dark chocolate... it doesn't get much better than that.


   Several years ago a good friend of mine and I made eclairs and, I don't remember why, we decided to zest a lemon into the pastry cream. I credit that heavenly pastry cream for her dad's subsequent renouncement of his diet for the afternoon.  I've never gone back to plain vanilla pastry cream- the tangy presence of lemon is welcome in any and every recipe I've used pastry cream with since.


   As a testament to the fabulousness of this cake, Steve has decided it is his new official birthday cake. And people, if you've ever seen that man with his carrot cake, you would realize the magnitude of this endorsement. It's that good.


Lemony Boston Cream Pie
Adapted from Gale Gand 
   Note: as a bonus, this recipe makes quite a bit of pastry cream and I ended up with about a cup extra. Apply to breakfast toast or warmed and spooned over ice cream to your heart's content!
  • 1 cup plus 2 tablespoons cake flour
  • 2/3 cup sugar
  • 1 1/2 teaspoons baking powder
  • 1/4 teaspoon salt
  • 1/2 milk
  • 1/4 cup cooking oil (I recommend canola)
  • 2 egg yolks
  • 1 teaspoon vanilla
  • 2 egg whites
  • 1/4 teaspoon cream of tartar
   Pastry Cream Filling
  • 2 cups milk (whole or 2%)
  • 1/2 vanilla bean, split lengthwise and seeds scraped
  • Zest of one lemon
  • 6 egg yolks
  • 2/3 cup granulated sugar
  • 1/4 cup corn starch
  • 1 tablespoon unsalted butter
Chocolate Ganache
  • 8 ounces high quality semisweet chocolate, chopped
  • 1 cup heavy whipping cream 
   To make the pastry cream: in a medium saucepan, bring the milk, vanilla bean with seeds and lemon zest to a simmer over medium heat. Immediately turn off the heat and set aside to infuse for 10 to 15 minutes. In a bowl, whisk the egg yolks and granulated sugar until pale and fluffy. Add the cornstarch and whisk vigorously until no lumps remain. Whisk in 1/4 cup of the hot milk mixture until incorporated. Very slowly whisk in the remaining hot milk mixture (you want to slowly bring the eggs up to temperature to avoid scrambling them).
   Pour the mixture back into the saucepan, discarding the vanilla bean. Cook over medium-high heat, whisking constantly, until thickened and slowly boiling. Remove from the heat, scrape into a mixing bowl and stir in the butter. Cover with plastic wrap, lightly pressing the plastic against the surface to prevent a skin from forming. Chill at least 2 hours or until ready to serve. This step can be done up to 24 hours in advance.
    To make the cake: Preheat oven to 350 degrees. Grease a 9 inch round cake pan with butter and coat with granulated sugar.
   In a medium mixing bowl combine flour, sugar, baking powder, and salt. Make a well in the center of the flour mixture. 
   In a large mixing bowl, beat egg whites and cream of tartar on medium to high speed until soft peaks form. Set aside.
   Add milk, oil, egg yolks, and vanilla to the dry cake ingredients. Mix with a rubber mixing spatula until well combined and very smooth. Fold in egg whites.
   Pour the batter into your prepared cake pan.  Bake for 25 to 30 minutes or until the top springs back when lightly touched. Invert the pan onto a wire rack. Cool for 15 minutes then remove from the pan and cool completely on a cake rack.
   To make the ganache: place the chocolate in a mixing bowl. In a saucepan, bring the cream to a bare simmer over medium heat. Pour the cream over the chocolate and gently stir until all the chocolate is melted and the mixture is very smooth. Set aside to cool until you are ready to assemble the cake.
   To assemble: cut the cake into two even layers with a long serrated knife. Place the bottom layer on your serving dish. Spread as much pastry cream as you desire over this first layer (I used enough to get about a half inch of pastry cream between the cake layers). Place the second layer atop the pastry cream and press gently to secure it in place. Spread a thin layer of ganache atop this, spreading it so it drips down the sides in places.
   Cake will keep at room temperature for up to 2 days. 
   Serves 8

This Just In...

Tuesday, August 23, 2011

   I have a small admission to make: I loath the news. I especially refuse to watch television news. The anchors, all stony faced and slathered in a frightening amount of make up, seem to have only one goal and that goal is to make us believe we live in a dangerous, hateful, doomed society of war mongers and philandering political figures who only wish to steal our money and ruin the moral fiber of the communities we live in. My goodness. Depressing.
   News for me exists almost solely in the gossip columns of various websites and, of course, the dining and arts section of the NY Times!


   Not that I don't care about our political climate or the state of the world at large. I certainly keep up on major elections and the like, but as far as my daily diet of information goes, public news simply is not welcome.
   Imagine my surprise then when everyone started talking about Hurricane Irene. Wait- it's hurricane season already?! I thought summer had just begun...
   I checked with Steve (my go to source for all things news related) and indeed, this category 4 beastadone is hurtling its way toward my precious East Coast town with nary a concern for things like houses and favorite backyard trees.
   This kind of storm warning is no novelty for me. The fall of my first year in Buffalo, I was a fresh faced and enthusiastic first year medical student when an unexpected and devastating snow storm tore through us in early October. Trees, still decked out in their colorful fall colors, splintered under the incredible weight of the ice and snow and fell like dominoes. Traffic lights came down in the streets, the fallen trees destroyed cars, crushed hapless pedestrians and created a landscape not unlike something out of a Tim Burton nightmare.
   My sixth floor walk up apartment was immediately plunged into darkness. Peeking around my door I was greeted with fathomless hallways and pitch black stairwells so reminiscent of The Shining that I slammed my door and cowered on the couch for several hours before I could tentatively come up with a plan of escape. An interminable day and a half later, when the authorities finally re-opened the only highway in and out of the city, I packed up my teeny honda, braved the free-for-all intersections, and got the heck out of dodge for the next 5 days.
   I will spare you the memory of my return when, upon opening my apartment door, I realized that in my haste I had forgotten that a fridge full of produce and meat products requires electricity in order to remain in a state of freshness...
   But it wasn't the carnage in my fridge that I remember most about that time. It was how kind everyone was to each other. Buffalo is notorious for drivers recklessly charging fresh red lights like manic Indy 500 racers, and suddenly those same drivers adopted a natural and gentle rhythm through darkened intersections. After the towering trees did their damage, no one was hurt. People all over the city were welcomed into the opened arms and kitchens of the handful of houses and apartments that maintained electricity. I spent a memorable night with a few friends in one such apartment, enjoying the unlikely pairing of yogurt and beer, not to mention the camaraderie.
   All this to say, I have faith that people can come through disaster well. That said, I am thankful for the warning this time and that I have Steve, who faithfully watches the news and is tirelessly preparing our little home for impending torrential rains and gale force winds.


   My first inclination was to buy wine and make Turkey Chili, his was to batten the windows and fill the guest room with bottled water. Thank goodness I have him to remember the essentials and keep me safe!
   Between Steve and I, it should be a windy, rainy weekend spent safely sequestered indoors with good drink and food. Not such a bad pair, the two of us.


Hurricane Irene's Turkey Chili

    Chili is the perfect extreme weather food in my opinion. Steve and I have been enjoying this recipe quite a bit recently, sans hurricane. It is spicy in a complex and not overly hot kind of way, tangy and rich with peppers and lean meat. We serve it over brown rice, but some buttered egg noodles would be scrumptious too.
  • 1 large onion, medium diced
  • 2-3 tablespoons olive oil
  • Coarse kosher salt, to taste
  • 2 lbs ground turkey meat (I use 94% lean)
  • 1 ½ teaspoons cumin
  • 1 teaspoon chili powder
  • 1/4 teaspoon red chili flakes
  •    1/4 to 1/2 teaspoon cayenne pepper, depending on your preferred spice level
  •   3 cloves garlic, minced
  • 2 28 oz cans diced tomatoes
  • Veggie stock (about 3 cups)
  • 5 bell peppers, a mixture of red and orange, medium diced
  • 1 can black beans, drained and rinsed
For Brown Rice
  • 1 cup short grain brown rice
  • 2 cups water
  • 1/2 teaspoon salt
  • 1/2 tablespoon olive oil

   Place all the ingredients for the rice in a medium saucepan. Bring to a boil, reduce heat to very low and simmer gently for 40-60 minutes until the rice is cooked through. Fluff with a fork.
   Meanwhile, in a heavy bottomed soup pot or dutch oven, sauté the onion in the olive oil, sprinkled with salt, over medium heat until quite soft and translucent- 5-10 minutes. Add the spices and garlic. Cook, stirring constantly, until very fragrant, about 1 minute.
   Add the ground turkey, sprinkle with more salt, increase the heat to medium high and cook, stirring often, until meat is browned and cooked through.
   Add the diced tomatoes with their juices and peppers. Stir all this together and add enough stock so that the liquid just barely covers the peppers and meat. Bring to a simmer and cook, covered, for twenty minutes, stirring occasionally.
   Add the beans, taste and season with more salt as needed. Simmer another 5 minutes.
   As a seasoning guideline, I use approximately 2 1/2 teaspoon kosher salt, total.
   Serve over freshly cooked brown rice.
   Makes 8-10 servings- perfect for left over lunches!


Mushroom Magic

Wednesday, July 27, 2011

   Once upon what seems like a very long time ago, I was a five year old with an extremely limited palate. One of my steadfast food rules was never, ever, even-if-a-stranger-has-a-gun-to-your-head, eat your pizza with any sort of topping except cheese. I stood by this rule with what I now view as extreme loyalty.

   In my defense, the most common topping ordered in our household was either pepperoni (gave my little self reflux) or mushroom (gray, slimy, wet, from a can... 'nuff said).

   Those mushrooms will always have a very special place in my heart. One night, while enjoying pizza dinner with my family, they were doing their best to encourage me to try the mushroom pizza. No, no, no I emphasized, not over my dead body. Finally, dinner was over and I huffed outside. What was their issue anyway? I didn't force my obviously superior pie of plain cheese on them! In the midst of my self righteous internal rant, twilight crept into our back yard, and I spotted... mushrooms. A whole lot of them! There they were, quietly growing in my very back yard, under some of the brushy trees at the edges of our property. Perfect, I thought, now I can try mushrooms with no one watching, there will be no pressure, I can even spit them right back out if they taste as funky as they look. I went ahead and popped a few in my mouth. I remember the earthy flavor to this day: dark, complex and mysterious, intangible... unlike anything I had every tasted.


   Next thing I knew, my older brother was dragging me inside, yelling for my mom like a mad man. Turns out, wild mushrooms are not the sort you place atop your pizza unless you are trained in the art of mushrooming. A mouthful of ipecac and several hours of retching later, my adventurous taste buds went on hiatus once again, not to be seen for another ten years.

   There really aren't enough nice things I can say about siblings who watch out for their less than savvy halves.


  Anyway, that little girl eventually grew up and discovered New York style pizza and a wider variety of culinary delights to place atop them. When Steve and I went to Italy last year, we started every single day with pizza buscaiola, a round of thin, crusty, chewy, tangy dough with the barest whisper of sauce and fresh buffalo mozzarella. These pies were finished with hunks of just made pork sausage and, you guessed it- mushrooms! I couldn't have loved those piping hot plates of dough and cheese more.


   This past year, during the Dark Time as I will now refer to my months as an intern, I started making Post Call Pizza. I would blunder home around lunch time of the day following the start of my shift, tired and possibly reeling from some kind of medical tragedy that my tired mind hadn't the chance to process. I remember these mid afternoons in a haze of warm sunlight, the rays breaking through leaves so green it almost broke my heart to behold. I would wander into my kitchen, open a cupboard and throw together a handful of this and that to create a pliable, tangy smelling dough that yielded to my hands in the sweetest possible way. This ten minute window of doughy therapy was the perfect antidote to the previous night, the sweetest introduction to my post call nap.


   Five hours later I would wake, roll the dough and sprinkle toppings, hug Steve and enjoy a slice or two of perfection- a taste of memory, love and homemade flavor.

   I gift this pizza to you, minus the exhaustion and heart ache. Buon appetito!


Post Call Pizza Buscaiola
   Makes one 13 inch pizza 
   Special equipment needed: 13 inch pizza stone 
  • 3/4 cup warm water
  • 2 1/4 teaspoons (or one packet) active dry yeast
  • 2 tablespoons honey
  • 1 1/2 cups all purpose, unbleached flour, plus more for kneading
  • 1/2 teaspoon salt
  • 1/2 cup plain tomato sauce
  • 2 cups shredded mozzarella cheese (doesn't have to be fresh, I like Organic Valley brand)
  • 1 pint baby bella mushrooms, dirt brushed off with a damp cloth, sliced thin
  • 1 hot Italian sausage in natural casing (the ones I got from the deli weigh about 7 ounces)
   In a medium sized mixing bowl, add the water and mix in the honey. Sprinkle the yeast over the top and allow to dissolve and become foamy, about 5 minutes. Add the flour and salt, stir to incorporate, then dump the whole lot onto the counter. Knead, adding as little flour as you can manage to keep the dough from sticking to your hands and the counter top, for a full 10 minutes. The dough will become smooth and pliable but never been completely stick free. This pizza dough needs a good work over and the relatively high moisture content to eventually become that crisp but chewy crust we're after.
   Very lightly grease a medium sized bowl with olive oil, place the dough in the bowl and cover with plastic wrap. Now you have several options: you can leave it to rise at room temperature for at least 4 hours or up to 8, or you can place it in the fridge for up to 24 hours. If going the fridge method, remove from the fridge 30 minutes to an hour prior to baking to allow it to come back to room temperature.
   When ready to assemble your pizza: preheat the oven to 500 degrees. Sprinkle your work surface with flour and use a rolling pin to roll the dough to a little less than 1/4 inch thickness. Make sure to lift the edges frequently and re sprinkle with flour to prevent sticking. Slide your pizza stone under the dough. You need at least an inch of extra dough hanging off the edges.
   Spread the tomato sauce evenly over the surface, up to 1/2 an inch away from your stone edge. Evenly spread the cheese over this. Now evenly layer with your mushroom slices. Finally, slice open the sausage and pull one inch hunks of the meat out, distributing evenly over the top of your pizza. Crimp the extra dough around the edges to create your crust, pinching it down with your fingers (if there is a lot of overhang just trim accordingly to get an extra inch or so that you can crimp into a crust).
   Slide into the middle third of the oven and bake for 20-25 minutes or until the top is bubbling and the edges are browned and sound hollow when knocked with your knuckle. Allow to cool 5 to 10 minutes. Slice. Devour!
   Note: this dough shouldn't stick to your pizza stone if you rolled it with enough flour. However, if using your stone for the first time, make sure to brush the stone first in olive oil, then lay your dough over this. After this treatment your stone should be stick free for future use.

Summer Sweet

Sunday, July 24, 2011

   I have a mid summer's gift for you- it's cool, crunchy, delightfully green and a master of flavor. I give you- bok choy!


   This really shouldn't surprise you, given that this humble green is a member of my most favorite plant family, the mighty and majestic brassica. I love this plant for its oh-so-cute and bright leafy greens atop a crunchy, clean stalk, for its sweet and earthy flavor, for how easily it fits into a wide variety of my old standby recipes.  I also love it because, so many, many years ago in China, it was cultivated for its healthful, medicinal qualities and has survived to this day on its own moxy.

   The recipe I'm going to share today was inspired by the most memorable dishe I had the pleasure of tasting at a favorite restaurant of mine while living in Buffalo. I used to frequent this place with one of my closest friends from medical school. We liked to take breaks from the hectic academic life we were living and cozy up to the intimate tables, hiding from the bitter cold outside with glasses of rich wine and plates of comforting food.


   One such night, I ordered the salmon on a bed of sweet potato and spinach. The chef had slow cooked onions until they achieved sweet nirvana, added cubes of yam and topped it off with wilted spinach and a buttery, vegetable stock scented sauce. I forget if the salmon was any good- I couldn't stop eating that bed of sweet, savory greens and yam! Yam and sweet potato often are used interchangeably, however, true yams are darker orange with a thinner, dark red skin and contain more dense nutrients than their larger, paler cousin, the sweet potato. Yams aren't always in season, and either can be used in this recipe with equally fantastic results.


   Although I've always made this the original way I tasted it, with spinach, I'm sharing the variation Steve and I tried last night, with bok choy, because we loved it so much and I think the texture and flavor of the bok choy is perfect amidst this summer heat.


   Steve and I first made this dish at the very beginning of our relationship, and I thought it was very fitting to have for dinner on a day we realized just how much we've acomplished and seen in the time we've been together. We toasted to the future and our amazingly good fortune over this meal, as we hope you toast yours!

  Oh yes, and today was Sticky Bun Sunday...


Salmon with Sweet Potato and Bok Choy Saute 
   Serves 2


Note: I find bok choy to be almost as difficult to completely de-silt as leeks, and therefore I recommend the following: trim the base off and peel each stalk away, individually cleaning them. This way, you can ensure no sneaky bits of suspicious crunch make their way into your silky final product.
  • 1 medium sweet onion, chopped
  • 2 tablespoons olive oil
  • 2 tablespoons unsalted butter, divided
  • Coarse kosher salt
  • Freshly ground pepper
  • 1 large or 2 small sweet potatoes or yams, diced to 1. 5 centimeter cubes (you will need approximately 2 1/2 to 3 cups of the sweet potato)
  • 3 baby bok choy or one full sized, cleaned as described above, and sliced
  • Highest quality vegetable stock
  • Two 4 ounce salmon fillets, skin on
  • Coarse kosher salt
  • Freshly ground pepper 
  • Olive oil
   Preheat the oven to 400 degrees. Place the salmon in a baking dish, drizzle with olive oil then generously sprinkle with salt and pepper.

   Add the onion, olive oil and one tablespoon of the butter to a large, deep, saute pan that has a cover. Sprinkle with about a teaspoon of the salt and 1/2 teaspoon fresh pepper. Allow to cook over low heat at a bare sizzle, stirring occasionally, until the onions are completely translucent and slightly browned and caramelized.
   At this point, slide the salmon into the oven. I cook mine for 25 minutes in a very hot oven because I like the color and crust it gives, if you prefer your salmon rare, adjust cooking time accordingly.
   Add the potato cubes, cover, and cook, stirring once in a while, for 10 minutes. At the end of this cooking time, there should be some color clinging to the bottom of the pan and the potato should be fork tender but NOT mushy.
   Add the sliced bok choy all at once, sprinkle with a little more salt, and cook, uncovered, for about five minutes, stirring it around occasionally.
   Now add 1 cup of the veggie stock and the second tablespoon of butter. Simmer, stirring occasionally, until the stock has thickened into a sweet sauce, the consistency of good gravy (this takes 5-10 minutes). Pierce a piece of bok choy stalk to make sure it is fork tender. Taste, and season with more salt if needed.
   Serve the salmon over a bed of the saute. Although traditionally fish is enjoyed with white wine, I like this with a glass of Cotes du Rhone.

On Family and Home

Monday, July 4, 2011

   When I moved south with Steve, we settled into what I consider to be my first home since moving out of my parents' house. Home is an incredibly nebulous, indefinable thing for me, and I would bet, for most people. Between living with my parents as a child a teenager and, as a young woman moving into my first home with Steve, there were four other places in which I tried out my home maker skills.

   There was a year spent in cramped dorm room quarters with my older sister. A 10 X 15 foot rectangle, all industrial tile ceramic floors and standardized cubes of closet space. But it wasn't the cramped space or the communal showers that would frequently be clogged with gobs of inexplicable hair after the weekend that bothered me- it wasn't even our loud and occasionally hysterical neighbors who now remind me of a scene from Jersey Shore. What bother me the most was not having a place to cook. The shared kitchens on each floor of the dorm were ill equipped at best, the tiny electric burners and ovens operating in an erratic manner that never failed to scorch each and every thing I tentatively brought near the evil thing. We compensated as best we could with a large variety of illegal electric cookware smuggled into the dorm, but there was no denying a move was drawing near.

   After the dorm we took on a roommate and an adorable second floor walk up in the town surrounding the college. It was a cozy, old Victorian home with the entire upstairs converted into a three bedroom apartment. The best part, for me, was the kitchen. The floors sagged and the window caught at only a quarter of the way open, but it was my first real kitchen away from home. And I loved it.

   My apartments in medical school are rather forgetful to me now. The first was an impersonable sixth floor walk up. The second had beautiful wooden floors and lot of south facing windows. It had a galley style kitchen, narrow and long, making it easy for me to stand in one place and cook an entire meal, simply reaching this way and that- into the fridge, onto the stove, now onto the counter.

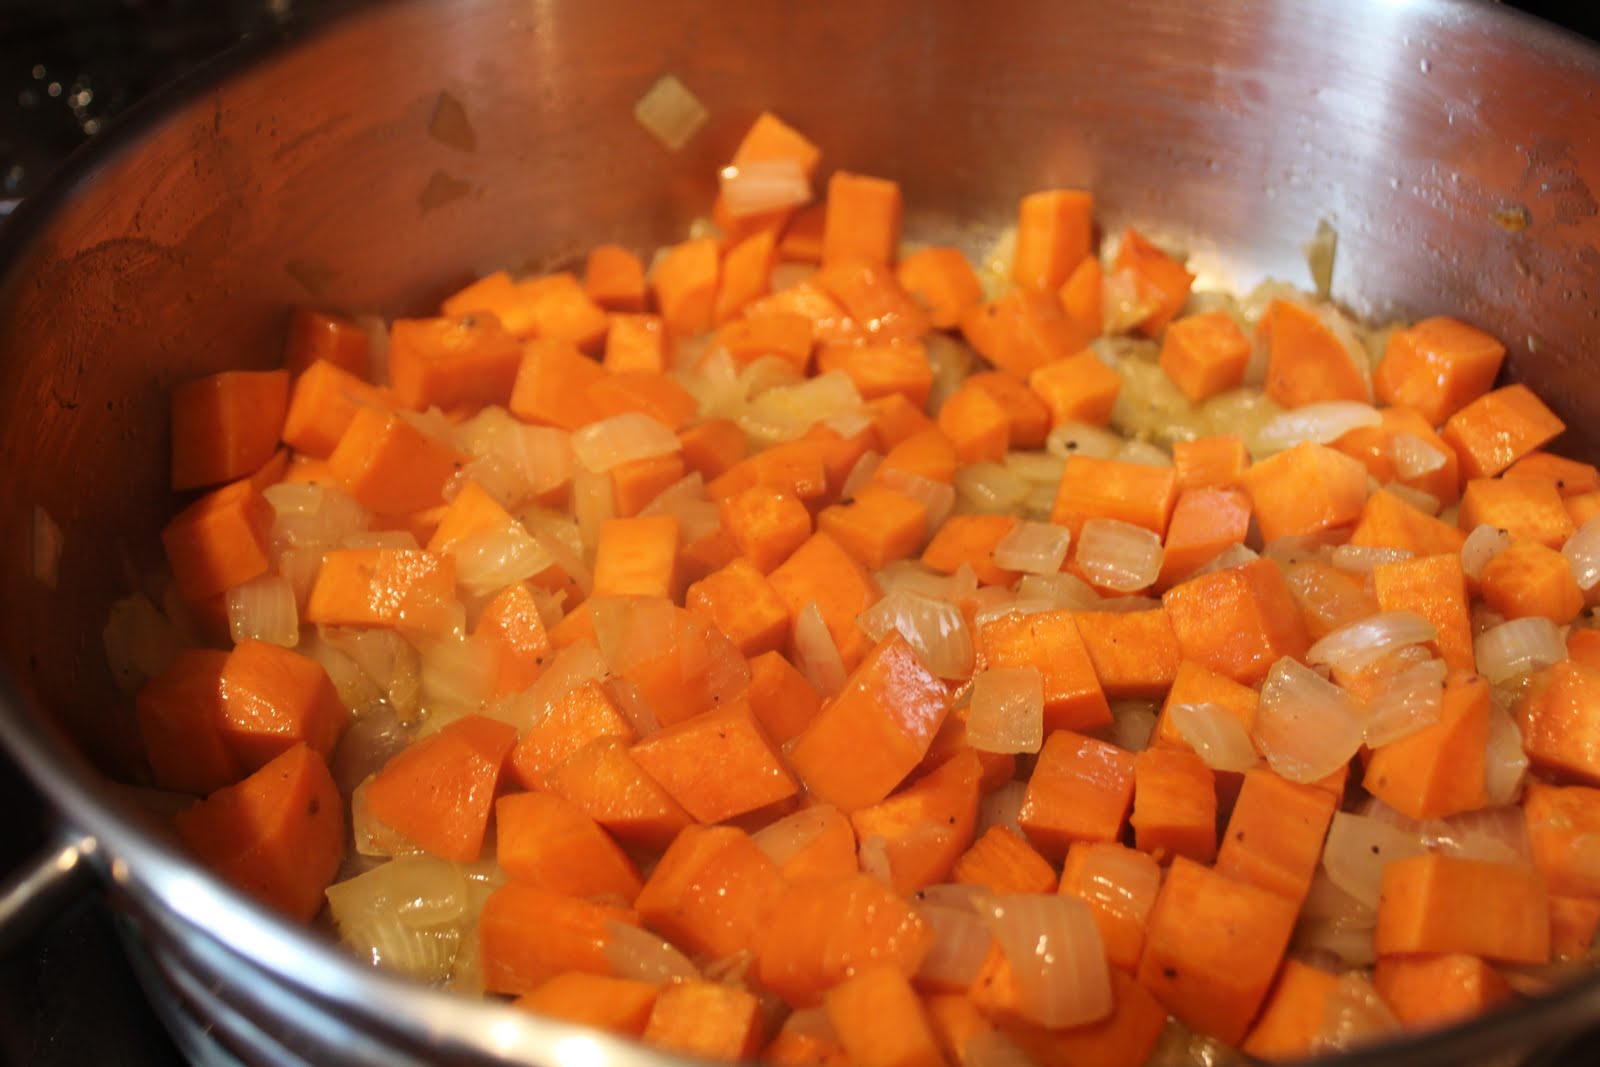
   The beginning of my relationship with Steve I remember mostly in the setting of his apartment, where I stayed many days at a time in my fourth year, escaping from medical school, immersing myself in the glow of what we had found in each other. My cooking style during that time became the simplest it has ever been. Rather than concoct elaborately impressive meals, I concentrated on the freshest vegetables and meats that I could find, making us delicious sautes, bruschettas and lightly dressed pastas.

   I have a feeling no matter where we put our anchor down, as along as Steve was there, it would be home. There are a thousand little things that help make this our home- the cheery yellow color, its huge and impossibly sun drenched back yard, filled with green leafy things and cheery flowers of all colors and sizes.  And of course there is the fact that it's just the right size for two people, that Steve has a shed for all his projects and greasy tools and that I have a beautiful, airy kitchen where I can knead, chop and sear my time away.

   When I distill what home has meant to me over the years, I believe it probably isn't the place, the walls or even the kitchens. Home for me is simply the back drop for the times in my life when I really knew I was living. Growing up with my brothers and sisters, learning to cook with my mother, and eventually, without her, forging a new and exciting path with Steve, all these memories and experiences are the times I've felt most alive, most happy. Home is a feeling, a sense of love, a cushion of time and sensation of infinity. The cheery walls, the flowers and pretty kitchen are just a bonus.


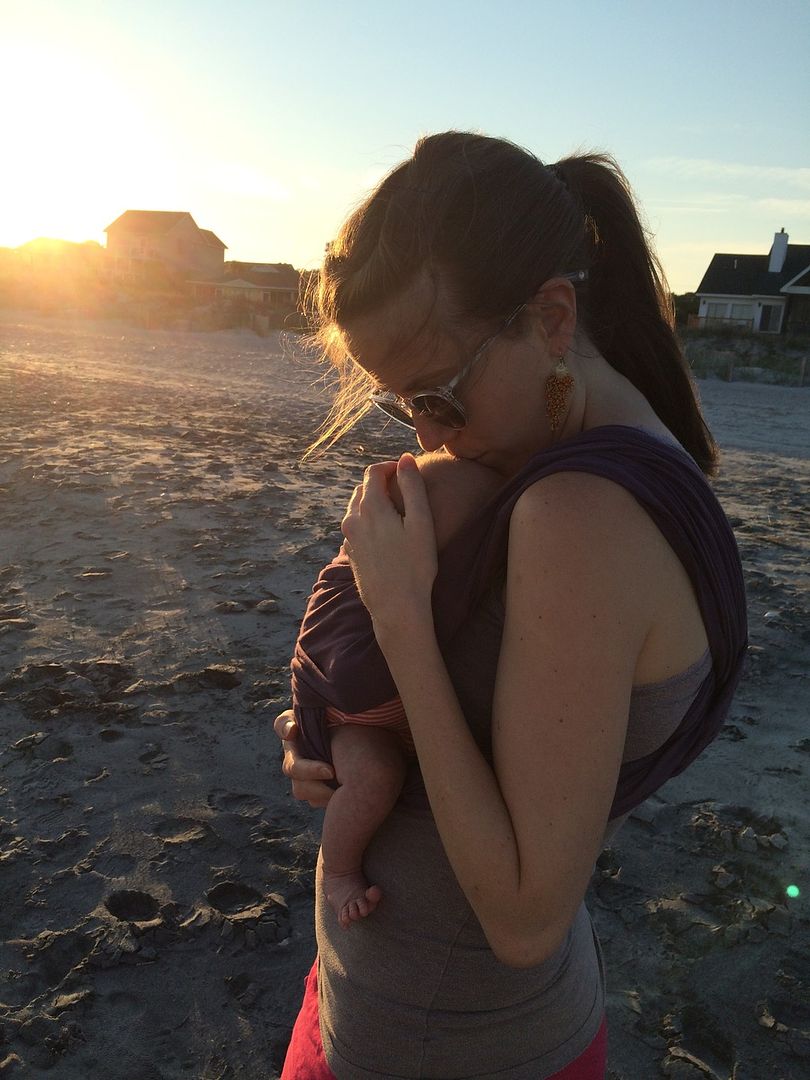
   This past weekend my family descended on the south, took over our little house for two days, and celebrated the Fourth of July with us. We ate, we drank, we talked and drank some more. But most importantly we had great fun, caught up on each others lives and remembered how lucky we are to call each other friends. Our small dinner table was packed with plates, laughter and people. Steve held my hand, and as I looked around and realized my home now officially extended to my whole family, I smiled so hard my cheeks hurt.

   I made a big, boisterous, chocolate cake for dessert- all sturdy with its fudgy double layers and airy with its tufts of silky frosting. It was meant to be a birthday cake for my mom and my sister in law but after I made it, I couldn't think of a better dessert to enjoy on the weekend we celebrate the birth of our country. Happy Fourth, everyone, have a slice of birthday cake and don't forget to toast with a glass of wine!

Happy Fourth of July Birthday Cake
Adapted from BonAppetit.com
Makes three 8 inch layer cakes or two 10 inch cakes

Note: don't be afraid of the mayonnaise. I could try and convince you it makes a dense, moist and yet amazingly light crumbed cake, but I won't. I'll just say: trust the mayonnaise. 

1 ounce unsweetened chocolate
1 ounce semi sweet chocolate
2/3 cup unsweetened cocoa powder
1 3/4 cups boiling water  
2 3/4 cups all purpose flour  
1 1/4 teaspoons baking soda 
1/4 teaspoon baking powder  
1 cup sugar 1 cup (packed) brown sugar  
1 1/3 cups mayonnaise (do not use reduced-fat or fat-free)  
2 large eggs  
1 teaspoon vanilla extract

   Preheat oven to 350°F. Butter and flour three 8 cake pans or two 10 inch cake pans.   
   Combine chopped chocolate and cocoa powder in medium metal bowl. Add 1 3/4 cups boiling water and whisk until chocolate is melted and mixture is smooth. 
   Sift flour, baking soda, and baking powder into another medium bowl. 
   Using electric mixer, beat both sugars and mayonnaise in large bowl until well blended, 2 to 3 minutes. Add eggs 1 at a time, beating until well blended after each addition. Beat in vanilla. 
   Add flour mixture in 4 additions alternately with chocolate mixture in 3 additions, beating until blended after each addition and occasionally scraping down sides of bowl. 
   Divide batter among prepared cake pans. Bake cakes until tester inserted into center comes out clean, 30 to 32 minutes. Cool cakes in pans on racks 20 minutes.
    Run small knife around sides of cakes to loosen. Carefully invert cakes onto racks and let cool completely.
Silky Chocolate Frosting
Adapted from Martha Stewart's Baking Handbook
1 pound best quality semisweet chocolate, chopped
3 sticks unsalted butter, at room temperature
1 cup confectioner's sugar
1/2 teaspoon coarse kosher salt

   Place chocolate in a bowl set over a pan of simmering water, the bowl of chocolate should not be touching the water. Stir until melted through. Set aside or the fridge and allow to cool  but not hardened- 5 to 10 minutes in the fridge or 20 to 25 minutes on the counter. 
   In a mixer with the paddle attachment, beat the butter and sugar until light and fluffy.  Add chocolate and salt and beat on medium high until fluffy, glossy and light. Taste and add more sugar if needed.

   Set one layer of cake on your serving platter. Spread a cup of frosting on the top and set the second layer on top. If using three layers, reduce the amount between layers to 2/3 of a cup and repeat with the third layer. Frost the outside and top of cake. This cake requires no garnish or decoration- it is simple and delicious.