Social Icons

Mushroom Magic

Wednesday, July 27, 2011

   Once upon what seems like a very long time ago, I was a five year old with an extremely limited palate. One of my steadfast food rules was never, ever, even-if-a-stranger-has-a-gun-to-your-head, eat your pizza with any sort of topping except cheese. I stood by this rule with what I now view as extreme loyalty.

   In my defense, the most common topping ordered in our household was either pepperoni (gave my little self reflux) or mushroom (gray, slimy, wet, from a can... 'nuff said).

   Those mushrooms will always have a very special place in my heart. One night, while enjoying pizza dinner with my family, they were doing their best to encourage me to try the mushroom pizza. No, no, no I emphasized, not over my dead body. Finally, dinner was over and I huffed outside. What was their issue anyway? I didn't force my obviously superior pie of plain cheese on them! In the midst of my self righteous internal rant, twilight crept into our back yard, and I spotted... mushrooms. A whole lot of them! There they were, quietly growing in my very back yard, under some of the brushy trees at the edges of our property. Perfect, I thought, now I can try mushrooms with no one watching, there will be no pressure, I can even spit them right back out if they taste as funky as they look. I went ahead and popped a few in my mouth. I remember the earthy flavor to this day: dark, complex and mysterious, intangible... unlike anything I had every tasted.


   Next thing I knew, my older brother was dragging me inside, yelling for my mom like a mad man. Turns out, wild mushrooms are not the sort you place atop your pizza unless you are trained in the art of mushrooming. A mouthful of ipecac and several hours of retching later, my adventurous taste buds went on hiatus once again, not to be seen for another ten years.

   There really aren't enough nice things I can say about siblings who watch out for their less than savvy halves.


  Anyway, that little girl eventually grew up and discovered New York style pizza and a wider variety of culinary delights to place atop them. When Steve and I went to Italy last year, we started every single day with pizza buscaiola, a round of thin, crusty, chewy, tangy dough with the barest whisper of sauce and fresh buffalo mozzarella. These pies were finished with hunks of just made pork sausage and, you guessed it- mushrooms! I couldn't have loved those piping hot plates of dough and cheese more.


   This past year, during the Dark Time as I will now refer to my months as an intern, I started making Post Call Pizza. I would blunder home around lunch time of the day following the start of my shift, tired and possibly reeling from some kind of medical tragedy that my tired mind hadn't the chance to process. I remember these mid afternoons in a haze of warm sunlight, the rays breaking through leaves so green it almost broke my heart to behold. I would wander into my kitchen, open a cupboard and throw together a handful of this and that to create a pliable, tangy smelling dough that yielded to my hands in the sweetest possible way. This ten minute window of doughy therapy was the perfect antidote to the previous night, the sweetest introduction to my post call nap.


   Five hours later I would wake, roll the dough and sprinkle toppings, hug Steve and enjoy a slice or two of perfection- a taste of memory, love and homemade flavor.

   I gift this pizza to you, minus the exhaustion and heart ache. Buon appetito!


Post Call Pizza Buscaiola
   Makes one 13 inch pizza 
   Special equipment needed: 13 inch pizza stone 
  • 3/4 cup warm water
  • 2 1/4 teaspoons (or one packet) active dry yeast
  • 2 tablespoons honey
  • 1 1/2 cups all purpose, unbleached flour, plus more for kneading
  • 1/2 teaspoon salt
  • 1/2 cup plain tomato sauce
  • 2 cups shredded mozzarella cheese (doesn't have to be fresh, I like Organic Valley brand)
  • 1 pint baby bella mushrooms, dirt brushed off with a damp cloth, sliced thin
  • 1 hot Italian sausage in natural casing (the ones I got from the deli weigh about 7 ounces)
   In a medium sized mixing bowl, add the water and mix in the honey. Sprinkle the yeast over the top and allow to dissolve and become foamy, about 5 minutes. Add the flour and salt, stir to incorporate, then dump the whole lot onto the counter. Knead, adding as little flour as you can manage to keep the dough from sticking to your hands and the counter top, for a full 10 minutes. The dough will become smooth and pliable but never been completely stick free. This pizza dough needs a good work over and the relatively high moisture content to eventually become that crisp but chewy crust we're after.
   Very lightly grease a medium sized bowl with olive oil, place the dough in the bowl and cover with plastic wrap. Now you have several options: you can leave it to rise at room temperature for at least 4 hours or up to 8, or you can place it in the fridge for up to 24 hours. If going the fridge method, remove from the fridge 30 minutes to an hour prior to baking to allow it to come back to room temperature.
   When ready to assemble your pizza: preheat the oven to 500 degrees. Sprinkle your work surface with flour and use a rolling pin to roll the dough to a little less than 1/4 inch thickness. Make sure to lift the edges frequently and re sprinkle with flour to prevent sticking. Slide your pizza stone under the dough. You need at least an inch of extra dough hanging off the edges.
   Spread the tomato sauce evenly over the surface, up to 1/2 an inch away from your stone edge. Evenly spread the cheese over this. Now evenly layer with your mushroom slices. Finally, slice open the sausage and pull one inch hunks of the meat out, distributing evenly over the top of your pizza. Crimp the extra dough around the edges to create your crust, pinching it down with your fingers (if there is a lot of overhang just trim accordingly to get an extra inch or so that you can crimp into a crust).
   Slide into the middle third of the oven and bake for 20-25 minutes or until the top is bubbling and the edges are browned and sound hollow when knocked with your knuckle. Allow to cool 5 to 10 minutes. Slice. Devour!
   Note: this dough shouldn't stick to your pizza stone if you rolled it with enough flour. However, if using your stone for the first time, make sure to brush the stone first in olive oil, then lay your dough over this. After this treatment your stone should be stick free for future use.

Summer Sweet

Sunday, July 24, 2011

   I have a mid summer's gift for you- it's cool, crunchy, delightfully green and a master of flavor. I give you- bok choy!


   This really shouldn't surprise you, given that this humble green is a member of my most favorite plant family, the mighty and majestic brassica. I love this plant for its oh-so-cute and bright leafy greens atop a crunchy, clean stalk, for its sweet and earthy flavor, for how easily it fits into a wide variety of my old standby recipes.  I also love it because, so many, many years ago in China, it was cultivated for its healthful, medicinal qualities and has survived to this day on its own moxy.

   The recipe I'm going to share today was inspired by the most memorable dishe I had the pleasure of tasting at a favorite restaurant of mine while living in Buffalo. I used to frequent this place with one of my closest friends from medical school. We liked to take breaks from the hectic academic life we were living and cozy up to the intimate tables, hiding from the bitter cold outside with glasses of rich wine and plates of comforting food.


   One such night, I ordered the salmon on a bed of sweet potato and spinach. The chef had slow cooked onions until they achieved sweet nirvana, added cubes of yam and topped it off with wilted spinach and a buttery, vegetable stock scented sauce. I forget if the salmon was any good- I couldn't stop eating that bed of sweet, savory greens and yam! Yam and sweet potato often are used interchangeably, however, true yams are darker orange with a thinner, dark red skin and contain more dense nutrients than their larger, paler cousin, the sweet potato. Yams aren't always in season, and either can be used in this recipe with equally fantastic results.


   Although I've always made this the original way I tasted it, with spinach, I'm sharing the variation Steve and I tried last night, with bok choy, because we loved it so much and I think the texture and flavor of the bok choy is perfect amidst this summer heat.


   Steve and I first made this dish at the very beginning of our relationship, and I thought it was very fitting to have for dinner on a day we realized just how much we've acomplished and seen in the time we've been together. We toasted to the future and our amazingly good fortune over this meal, as we hope you toast yours!

  Oh yes, and today was Sticky Bun Sunday...


Salmon with Sweet Potato and Bok Choy Saute 
   Serves 2


Note: I find bok choy to be almost as difficult to completely de-silt as leeks, and therefore I recommend the following: trim the base off and peel each stalk away, individually cleaning them. This way, you can ensure no sneaky bits of suspicious crunch make their way into your silky final product.
  • 1 medium sweet onion, chopped
  • 2 tablespoons olive oil
  • 2 tablespoons unsalted butter, divided
  • Coarse kosher salt
  • Freshly ground pepper
  • 1 large or 2 small sweet potatoes or yams, diced to 1. 5 centimeter cubes (you will need approximately 2 1/2 to 3 cups of the sweet potato)
  • 3 baby bok choy or one full sized, cleaned as described above, and sliced
  • Highest quality vegetable stock
  • Two 4 ounce salmon fillets, skin on
  • Coarse kosher salt
  • Freshly ground pepper 
  • Olive oil
   Preheat the oven to 400 degrees. Place the salmon in a baking dish, drizzle with olive oil then generously sprinkle with salt and pepper.

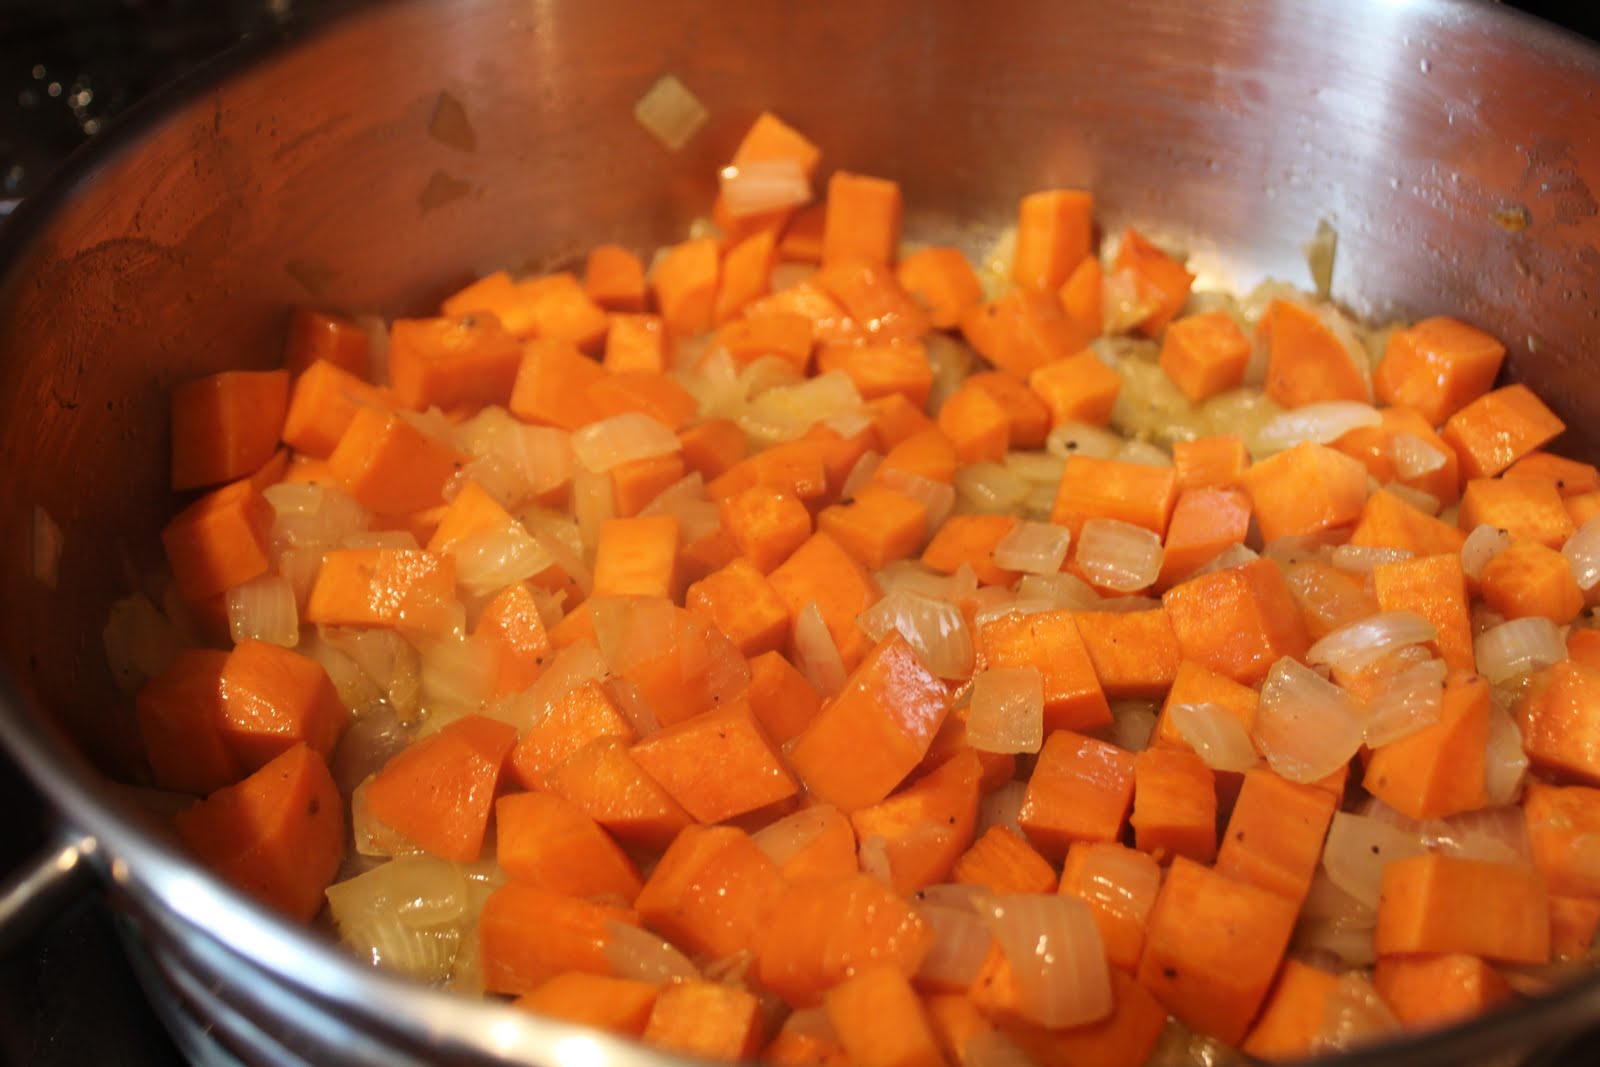
   Add the onion, olive oil and one tablespoon of the butter to a large, deep, saute pan that has a cover. Sprinkle with about a teaspoon of the salt and 1/2 teaspoon fresh pepper. Allow to cook over low heat at a bare sizzle, stirring occasionally, until the onions are completely translucent and slightly browned and caramelized.
   At this point, slide the salmon into the oven. I cook mine for 25 minutes in a very hot oven because I like the color and crust it gives, if you prefer your salmon rare, adjust cooking time accordingly.
   Add the potato cubes, cover, and cook, stirring once in a while, for 10 minutes. At the end of this cooking time, there should be some color clinging to the bottom of the pan and the potato should be fork tender but NOT mushy.
   Add the sliced bok choy all at once, sprinkle with a little more salt, and cook, uncovered, for about five minutes, stirring it around occasionally.
   Now add 1 cup of the veggie stock and the second tablespoon of butter. Simmer, stirring occasionally, until the stock has thickened into a sweet sauce, the consistency of good gravy (this takes 5-10 minutes). Pierce a piece of bok choy stalk to make sure it is fork tender. Taste, and season with more salt if needed.
   Serve the salmon over a bed of the saute. Although traditionally fish is enjoyed with white wine, I like this with a glass of Cotes du Rhone.

On Family and Home

Monday, July 4, 2011

   When I moved south with Steve, we settled into what I consider to be my first home since moving out of my parents' house. Home is an incredibly nebulous, indefinable thing for me, and I would bet, for most people. Between living with my parents as a child a teenager and, as a young woman moving into my first home with Steve, there were four other places in which I tried out my home maker skills.

   There was a year spent in cramped dorm room quarters with my older sister. A 10 X 15 foot rectangle, all industrial tile ceramic floors and standardized cubes of closet space. But it wasn't the cramped space or the communal showers that would frequently be clogged with gobs of inexplicable hair after the weekend that bothered me- it wasn't even our loud and occasionally hysterical neighbors who now remind me of a scene from Jersey Shore. What bother me the most was not having a place to cook. The shared kitchens on each floor of the dorm were ill equipped at best, the tiny electric burners and ovens operating in an erratic manner that never failed to scorch each and every thing I tentatively brought near the evil thing. We compensated as best we could with a large variety of illegal electric cookware smuggled into the dorm, but there was no denying a move was drawing near.

   After the dorm we took on a roommate and an adorable second floor walk up in the town surrounding the college. It was a cozy, old Victorian home with the entire upstairs converted into a three bedroom apartment. The best part, for me, was the kitchen. The floors sagged and the window caught at only a quarter of the way open, but it was my first real kitchen away from home. And I loved it.

   My apartments in medical school are rather forgetful to me now. The first was an impersonable sixth floor walk up. The second had beautiful wooden floors and lot of south facing windows. It had a galley style kitchen, narrow and long, making it easy for me to stand in one place and cook an entire meal, simply reaching this way and that- into the fridge, onto the stove, now onto the counter.

   The beginning of my relationship with Steve I remember mostly in the setting of his apartment, where I stayed many days at a time in my fourth year, escaping from medical school, immersing myself in the glow of what we had found in each other. My cooking style during that time became the simplest it has ever been. Rather than concoct elaborately impressive meals, I concentrated on the freshest vegetables and meats that I could find, making us delicious sautes, bruschettas and lightly dressed pastas.

   I have a feeling no matter where we put our anchor down, as along as Steve was there, it would be home. There are a thousand little things that help make this our home- the cheery yellow color, its huge and impossibly sun drenched back yard, filled with green leafy things and cheery flowers of all colors and sizes.  And of course there is the fact that it's just the right size for two people, that Steve has a shed for all his projects and greasy tools and that I have a beautiful, airy kitchen where I can knead, chop and sear my time away.

   When I distill what home has meant to me over the years, I believe it probably isn't the place, the walls or even the kitchens. Home for me is simply the back drop for the times in my life when I really knew I was living. Growing up with my brothers and sisters, learning to cook with my mother, and eventually, without her, forging a new and exciting path with Steve, all these memories and experiences are the times I've felt most alive, most happy. Home is a feeling, a sense of love, a cushion of time and sensation of infinity. The cheery walls, the flowers and pretty kitchen are just a bonus.


   This past weekend my family descended on the south, took over our little house for two days, and celebrated the Fourth of July with us. We ate, we drank, we talked and drank some more. But most importantly we had great fun, caught up on each others lives and remembered how lucky we are to call each other friends. Our small dinner table was packed with plates, laughter and people. Steve held my hand, and as I looked around and realized my home now officially extended to my whole family, I smiled so hard my cheeks hurt.

   I made a big, boisterous, chocolate cake for dessert- all sturdy with its fudgy double layers and airy with its tufts of silky frosting. It was meant to be a birthday cake for my mom and my sister in law but after I made it, I couldn't think of a better dessert to enjoy on the weekend we celebrate the birth of our country. Happy Fourth, everyone, have a slice of birthday cake and don't forget to toast with a glass of wine!

Happy Fourth of July Birthday Cake
Adapted from BonAppetit.com
Makes three 8 inch layer cakes or two 10 inch cakes

Note: don't be afraid of the mayonnaise. I could try and convince you it makes a dense, moist and yet amazingly light crumbed cake, but I won't. I'll just say: trust the mayonnaise. 

1 ounce unsweetened chocolate
1 ounce semi sweet chocolate
2/3 cup unsweetened cocoa powder
1 3/4 cups boiling water  
2 3/4 cups all purpose flour  
1 1/4 teaspoons baking soda 
1/4 teaspoon baking powder  
1 cup sugar 1 cup (packed) brown sugar  
1 1/3 cups mayonnaise (do not use reduced-fat or fat-free)  
2 large eggs  
1 teaspoon vanilla extract

   Preheat oven to 350°F. Butter and flour three 8 cake pans or two 10 inch cake pans.   
   Combine chopped chocolate and cocoa powder in medium metal bowl. Add 1 3/4 cups boiling water and whisk until chocolate is melted and mixture is smooth. 
   Sift flour, baking soda, and baking powder into another medium bowl. 
   Using electric mixer, beat both sugars and mayonnaise in large bowl until well blended, 2 to 3 minutes. Add eggs 1 at a time, beating until well blended after each addition. Beat in vanilla. 
   Add flour mixture in 4 additions alternately with chocolate mixture in 3 additions, beating until blended after each addition and occasionally scraping down sides of bowl. 
   Divide batter among prepared cake pans. Bake cakes until tester inserted into center comes out clean, 30 to 32 minutes. Cool cakes in pans on racks 20 minutes.
    Run small knife around sides of cakes to loosen. Carefully invert cakes onto racks and let cool completely.
Silky Chocolate Frosting
Adapted from Martha Stewart's Baking Handbook
1 pound best quality semisweet chocolate, chopped
3 sticks unsalted butter, at room temperature
1 cup confectioner's sugar
1/2 teaspoon coarse kosher salt

   Place chocolate in a bowl set over a pan of simmering water, the bowl of chocolate should not be touching the water. Stir until melted through. Set aside or the fridge and allow to cool  but not hardened- 5 to 10 minutes in the fridge or 20 to 25 minutes on the counter. 
   In a mixer with the paddle attachment, beat the butter and sugar until light and fluffy.  Add chocolate and salt and beat on medium high until fluffy, glossy and light. Taste and add more sugar if needed.

   Set one layer of cake on your serving platter. Spread a cup of frosting on the top and set the second layer on top. If using three layers, reduce the amount between layers to 2/3 of a cup and repeat with the third layer. Frost the outside and top of cake. This cake requires no garnish or decoration- it is simple and delicious.

Kernels of Light

Wednesday, June 29, 2011

   I have fantastic news. Exciting, fun, giggly, amazing news. I have a new job....

   !

   I can hardly believe it. It is still in medicine, in a different specialty that is near and dear to my heart. As a child (a shy and, sure, sometimes weird child) I fancied myself a scientist, a whisperer of microscopes and all things strange and molecular. As an awkward but fascinated college student I spent countless hours at the bench, looking over slides of onion root (it's gorgeous, trust me) and different plant pollens (nature's airplanes!).


   Now, what feels like many years later, I am fortunate enough to be departing from one specialty and embarking on a career as a pathologist. This change has been a long time in the making, involving a lot of anxiety, thought and hard work. Now that the day for a little positive change has finally arrived, I couldn't be happier or feel more fortunate. I have so many amazing, supportive people in my life, both personal and professional, and I feel overcome with gratitude and hope for the future.

   To celebrate, I have, of course, a recipe to offer you. It's one of the first southern foods I fell in love with and therefore quite fitting with which to celebrate a return to my first love in medicine. I present to you- succotash! Just saying succotash makes me smile; it's one of those silly and whimsical names that's easy to imagine a child came up with many years ago.


   Succotash can have many guises, but at its most basic it is a saute of corn and some kind of bean. I like mine with tomatoes and onion for depth and color, and I like to use one of my absolute favorite beans- the baby lima, aka butter bean. Quality baby limas can be hard to find fresh and so I encourage you to buy them frozen. They taste just as good and frozen vegetables are often picked and flash frozen at their peak season. Flavor won't be sacrificed, trust me.


   That said, frozen corn is an absolute no for this recipe. Corn straight from the field, freshly peeled and kernels cut from the cob is a flavor that is quintessential summer to me. Growing up, my summers were spent sweating it out in the hay fields and barns. Lots of manual labor was a given, but if I got to end my day with three or four butter drenched cobs of corn, I was a happy girl. This succotash is like that buttery, drippy, messy cob of corn, only all grown up and dressed in its Sunday best.

   That's enough talk. Go forth. Make succotash.


Summer Succotash

1 cup diced onion
2 tablespoons olive oil
2 tablespoons butter, divided
coarse kosher salt, to taste
1 pint cherry tomatoes, sliced in half
4-5 ears of corn on the cob
11-12 ounces frozen baby lima beans

   Heat the olive oil and one tablespoon butter over medium low heat in a heavy bottomed sauce pan or dutch oven. Add the onions and about 1 teaspoon salt. Saute until translucent but not starting to brown, about 3-4 minutes.
   Add the tomatoes and cook at a simmer, covered, for about 5-10 minutes. You want the tomatoes to break down and start to make a sauce. Stir occasionally during this to make sure the bottom isn't scorching.
   Meanwhile, peel your corn and, using a sharp knife, cut the kernels off in sheets. Add the corn kernels and lima beans to the pot along with the second tablespoon of butter. Simmer, covered, another 10-15 minutes, stirring occasionally. Taste and season with salt to your liking.
   I like to serve this with oven roasted fish and mashed potatoes.

Some Darkness

Tuesday, June 21, 2011

   Today, I don't have a recipe for you. I don't have a pretty picture either. I have a sad message and I needed a place to get it off my chest, a place of safety and comfort. This blog has rapidly turned into the kind of space that contains all kinds of wonderful feelings for me- warmth, creativity, happiness, wonderful memories and a hopefullness for what I can make of my life one day. But sometimes, I feel the need to share not so happy things with you and I have so far stopped myself because I feel protective of this blog like a parent feels protective of their child- I want to shield the ugly parts of the world from it.

   I feel too tired this month to stop myself from seeking solice here. This rotation has overwhelmed me with a tremendous sense of sadness, loss and frustration.

   I lost a patient this week. I don't like that phrase, actually. I suppose I say it only because that is how all the other doctors and nurses describe this awful event. Why do we feel the need to make it sound so innocent? Children lose their retainers and socks that match. We lose our keys and misplace earrings. You don't lose patients.

   He died. He was impossibly young and born without a single advantage in this world, and despite everything so many people did, he died.

   When I decided to go into medicine, I underestimated how much of a toll such pain and suffering would take on my being. I remember as a teenager thinking about going into medicine and knowing, someplace deep in my soul, that medicine was too ugly for me. As much as I love people and everything about what it means to be alive, I somehow knew that being around the sick and dying, the neglected, the neglecful, would turn me into the kind of person I didn't want to be.

   Perhaps that is what I love so much about food. It isn't the physical entity that is food, it's the act of giving and enjoying and providing comfort, nourishment and love. Every meal I make, every plate of food I give, feels like a piece of brightness and hope that I put into the world in some small way. At its least, it calms the pangs of emptiness in someone's stomach, at its most, it enriches their day and puts a smile on their face.

   So there you have it. I feel saturated with the knowledge that bad things happen to innocents. We can try our hardest and know everything there is to know about the science behind what mysterisouly creates life amongst the billions of cells that we are. At the end of a long day, a baby still can die.

   Spend time with someone you love today, as many someones as you can manage. Make a big pot of comforting, thick brothed soup and dig in. Dig in and forget that it all could disappear, and there doesn't have to be a reason why.

   That's what I did. And it helped.

Sun and Salad for Working Woes

Tuesday, May 31, 2011

   Salads are tricky things. In particular, I'm still working on mastering the art of the simple green salad, dressed lightly with the barest hint of vinegar and oil, freshly whisked to emulsification by my very own hands.

   One thing I do know, however, is the chicken salad. The recipe I'm sharing today is one that started as a seedling in my cooking consciousness late last summer when my boyfriend and I picked up a couple of chicken salad wraps to take to the beach. They were filled with fresh greens and a chicken salad that contained dried cranberries, of all things. It made sense as soon as I bit into the bright, sweet berries, hidden amongst the chicken chunks- after all, the chicken is a cousin of the turkey, and who doesn't love turkey and cranberry sauce! I forgot about the wraps for a time, until a conversation with my sister when she started talking about something she called a Waldorf Salad that she had been making recently. It was basically a chicken salad, with various things that she finds about her pantry tossed in, but always including dried cranberries. Salivary glands awoken, I hung up the phone, gathered ingredients, and set to work.

   When constructing recipes, I always try and include elements that I know will provide the best and most vital nutrients, and, perhaps more importantly, make sure each of them contributes an exciting flavor or texture. With that in mind, I included, of course, the dried cranberries and added walnuts, celery and onions. The onion family contains some of the most potent and efficient antioxidants as well as various substances that serve to detoxify the body. As for cranberries, well, I don't think anyone has escaped reading at least one article about the many vitamins and nutrients found in this little berry. On top of all of that, cranberries actually physically absorb the free radicals we encounter in our every day lives (those nasty little particles that charge about and damage our cells, either aging them or harming their DNA). The walnuts were for crunch and those delightfully creamy and essential fatty acids.

   Starting tomorrow I go on a service that cares for cardiac patients. They are some of the sickest patients in the hospital, suffering from problems with their hearts or the vasculature associated with the heart, acquired either at birth or sometime after. Most of them have recently undergone corrective or palliative surgeries and require very close care and monitoring to make sure everything is in the correct working order to maintain proper heart rhythm, blood pressure and a host of other things. The schedule is further intensified by being on overnight call every fourth day. Calls are thirty hour shifts that run the gamut from quiet to frightening ill patients that may code or spike a phantom fever at any moment in the night.

   This recipe is going to be one of my staples during such a busy and exhausting month. It is nutritious, crunchy, creamy, sweet with a little spicy kick from the onion. More than all of that, it reminds me of days at the beach with my boyfriend and of my sister, so creative and fun in the kitchen. I hope you enjoy it one of these warm, sunny days as well. I don't have a picture to put up of the salad, but I do have one that I hope makes you all feel as summery as it makes me. Plus, it has a pelican flying in the background- a bird that never fails to make my heart soar with the sense that anything is possible and everything is calm in the world.


Crazy for Cranberries Chicken Salad

2 chicken breasts, boneless and skinless
coarse kosher salt
freshly ground black pepper
3/4 cup celery, diced
1/2 cup onion, diced
1/3 - 1/2  cup dried cranberries (I lean toward 1/2 cup, it depends on how much you like them- aim to get 1 or 2 with each bite)
1/3 cup chopped walnuts 
1/2 cup mayonaise

To serve: 6 inch whole wheat wraps and romaine lettuce, or a fresh salad of mixed greens if you prefer


   Preheat the oven to 375. Place the chicken breasts in a baking pans, side by side, and sprinkle with about 3/4 of a teaspoon of salt and a teaspoon of pepper.  Bake until thoroughly cooked and the edges are slightly browned, about 45 minutes. Chill completely in the fridge. Once chilled, chop the chicken into cubes and place in a mixing bowl with the rest of the ingredients except the ones for serving. Mix thoroughly. Allow to chill about a 1/2 hour so the flavors can mingle.
   I like to serve this in whole wheat wraps with romaine lettuce, but my sister often just places a scoop atop a fresh salad of mixed greens. This will keep in the fridge for up to three days, tightly covered. It makes 3-4 wraps depending on the size of the chicken breasts. I suggest eating them on the beach, if one happens to be nearby.

In Pursuit of Fry

Friday, May 27, 2011

   I'll just come right out and say it: I'm afraid of fried food.

   I think perhaps it has something to do with my New England roots- there is undeniably a deep, dark place amongst my appetites that demands all things fried whether they be salty or sweet or both. Some of my earliest food memories are of going to Ronnie's Clams deep in the rolling hills of Springfield Massachusetts. Here, my brothers and sisters would foolishly order fried clams (how disgusting!) and I would get an order of onion rings all to myself. Early on in my life, during the picky years as I will call them, I liked the flavor of onions but not the texture or the idea of eating the onion itself. I would sit and contentedly separate the fried, onion flavored goodness from the vegetable itself which was left behind in a wet, salty heap as I enjoyed my crispy plunder.

   After moving away form New England when I was eight, we rarely ate out since our farm was located at least an hour from any decent restaurant. As we got older and it was easier to drive longer distances, restaurants made a more regular appearance, but as a kid the majority of the meals I ate were of my mother's making and she very, very rarely fried anything. In fact, the only time I ever remember her frying was when she would break out her old cast iron fry pan (it was so seasoned from use that the bottom of it was slick and shiny, completely stick proof!), pour about an inch of vegetable oil in, and fry rounds of her home made dough to golden perfection. After a lightening quick dusting of confectioner's sugar she would distribute the pillowy dessert, still hot, to our eagerly waiting hands where we savored each bite.

   Maybe that is the real reason I shy away from fried foods as an adult. They were such a rare and anticipated treat as a child I think the abundance of fried-ness in our American lives is kind of a shame. I advise holding out for the good stuff- true, freshly cut french fires, fried dough from the hands of someone who cares, a doughnut hot from the oil of a friend's kitchen- I can't stress the value or flavor of these things enough.

   In the days and weeks between indulging the New Englander hiding inside me, I cheat with the stir fry. A couple of weeks ago I was perusing my favorite recipe websites, feeling uninspired. What I really wanted was something full of spice, flavor, lean protein and still crisp vegetables. An observant friend sitting nearby pointed out I was describing the prefect stir fry. That is what I set about to make, and that is the recipe that follows: a combination of all the flavors I craved on that day, one that I've revisited several times since, it's that good.

Gingered Pork Loin Stir Fry
1 to 1 1/2 pounds pork loin
3 tablespoons olive oil
salt and pepper
1 medium sweet onion, halved then sliced thinly
3 teaspoons finely grated fresh ginger root
1-2 pinches red chili flakes (depending on your heat preference)
3 tablespoons soy sauce
3 cups broccoli florets
3 cups cauliflower florets

Slice the pork loin crosswise into 1/2 inch rounds. Cut those round to measure uniform cubes, about 1 1/2 inches in size. Sprinkle with freshly ground black pepper and just a pinch or two of salt (the soy sauce later will add a lot of sodium, so go easy on the salt). Heat the oil over medium heat in a large, wide skillet. Wait until the oil shimmers and is very hot then add the pork and resist stirring for a few minutes, you want to get a nice sizzle and browning on the meat. While the meat browns, add the onions on top along with the ginger and chili flakes. Stir and flip the meat around to try and get the caramel color on as many surfaces as possible. When the meat is almost completely cooked through, add the soy sauce and stir to incorporate. Add the broccoli and cauliflower on top and, without stirring, cover the whole thing with a lid and allow the veggies to steam for 5 minutes. Remove the lid, stir to incorporate all the ingredients. Taste and season with more soy sauce or a few tablespoons of water depending on the saltiness. Test the veggies, if they are crisp tender, the meal is done, if still too crunchy, replace the lid and allow to cook another minute or two.
   This can be enjoyed on its own or on a bed of egg noodles. Serves 4-6 depending on how hungry you are!